Posts

Showing posts from 2014

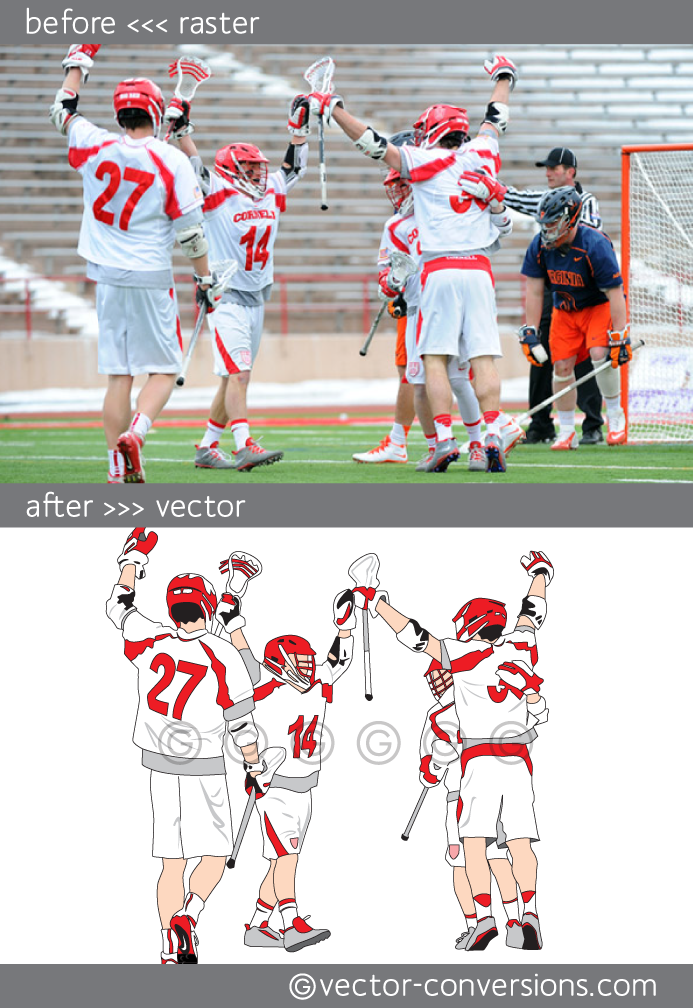
Photo to Vector Conversion

Image
Manual vectorization with soft color blends Here is an example of a recent vectorization from photo to vector (raster to vector). This drawing was for screen printing and, for this particular project, it didn't have to be drawn using only vectors. In addition to drawing with vectors, some vector graphics programs also have tools that allow you to use pixel-based, raster (non-vector) elements such as soft color blends & shading/highlights. A graphic that is created with a vector drawing program but also includes pixel-based smooth color blends and soft shading is not a 100% vector graphic, or a true vector graphic; it contains both raster and vector elements. See Raster vs Vector Photographs are raster graphics made with pixels: a multitude of different color pixels create a realistic image. Vector graphics are drawings made with objects: lines and curves that create shapes. When a photo is vectorized, it means a drawing of the photo is being made and, i n mo

High Resolution Image for Printing

Image
What is a high resolution image? Common image files such as jpg, gif, png, tif, psd, bmp, are measured in pixels. The resolution of a pixel-based graphic is the number of pixels within an inch: PPI (pixels per inch) Whether the image has high enough resolution depends on the process being used. Generally, offset printers (paper printing) require a minimum of 300 ppi, screen printers (cloth printing) require 240 ppi. In order to determine whether an image is high enough resolution, you need to know 3 things: Your image's pixel dimensions (e.g 850 pixels wide) The printed size desired (e.g. want to print a 4 inch image on paper) The resolution required by the process your image will go through (e.g. printing 300 minimum ppi) ASSUMING RESOLUTION NEEDED IS 300 PPI  If your image is: (pixels wide) It can be printed in good quality at: (inches wide) 100 0.333 200 0.667 300 1 400 1.333 500 1.667 600 2 700

Photo to vector for engraving

Image
The only thing I know about engraving is that the vector artwork needs to be created in black and white line-art, and depending on the size of the actual engraving, real small detail should be avoided. There is actually a lot of small detail on the image below and I was sure the engraver was going to reject it but the plaque must have been large enough to hold all the detail.  Some challenges may arise when changing a multi-color image to black and white LINEART (not black and white grayscale ). Elements in the graphic will no longer be defined by different color or shades of gray, they have to be black or white only and you will have to decide which elements are black and which elements are white. Using outlines instead of fills usually works to separate two objects of similar color. When images are on a color background, removing the background may make the overall feel of the image look different. After playing around with these element

From Photo to Vector

Image
Here is a recent photo to vector conversion. The project was to change a full color photograph into a simplified vector illustration to be printed using only 3 or 4 colors maximum. (not using the 4 color or full color process but rather 3 or 4 "spot" colors) The vector file was built with 3 colors: 1. tan, 2. black, 3. red. The gray is a percentage of the black color and can be printed using black ink and "halftone screens". For processes which do not use halftone screens this would be considered a 4 spot color vector illustration: 1. tan, 2. black, 3. red, and 4. gray. Before online printing exploded as a convenient and inexpensive venue for printing full color, many small printers only had capabilities for printing 1 or 2 color pieces and these were much cheaper than "full color" or "4-color-process" printing. Now most printers can pretty much print anything but there are a lot of processes that still require simplified illustrations w